Trying Out Kubestack For Gitops
I recently came across Kubestack which is a GitOps framework for kubernetes Infra automation.
- Kubestack currently supports AWS, AZURE and GCP .
- Kubestack has it’s own terraform provider as well which is supported by
Kubestackteam.
In my current project, we are using GCP so thought of trying out the tutorial for GKE (GCP managed kubernetes service).
The tutorial is very well documented and has clear instructions for multiple OS including Linux , macOS and Windows .
But tutorial was a bit outdated for GKE and had to make few changes for getting it to work. Also the documentation lacks the 1 click code/commands snippet “Copy” function :clipboard: .
Things that need to be updated which were not specified in documentation:
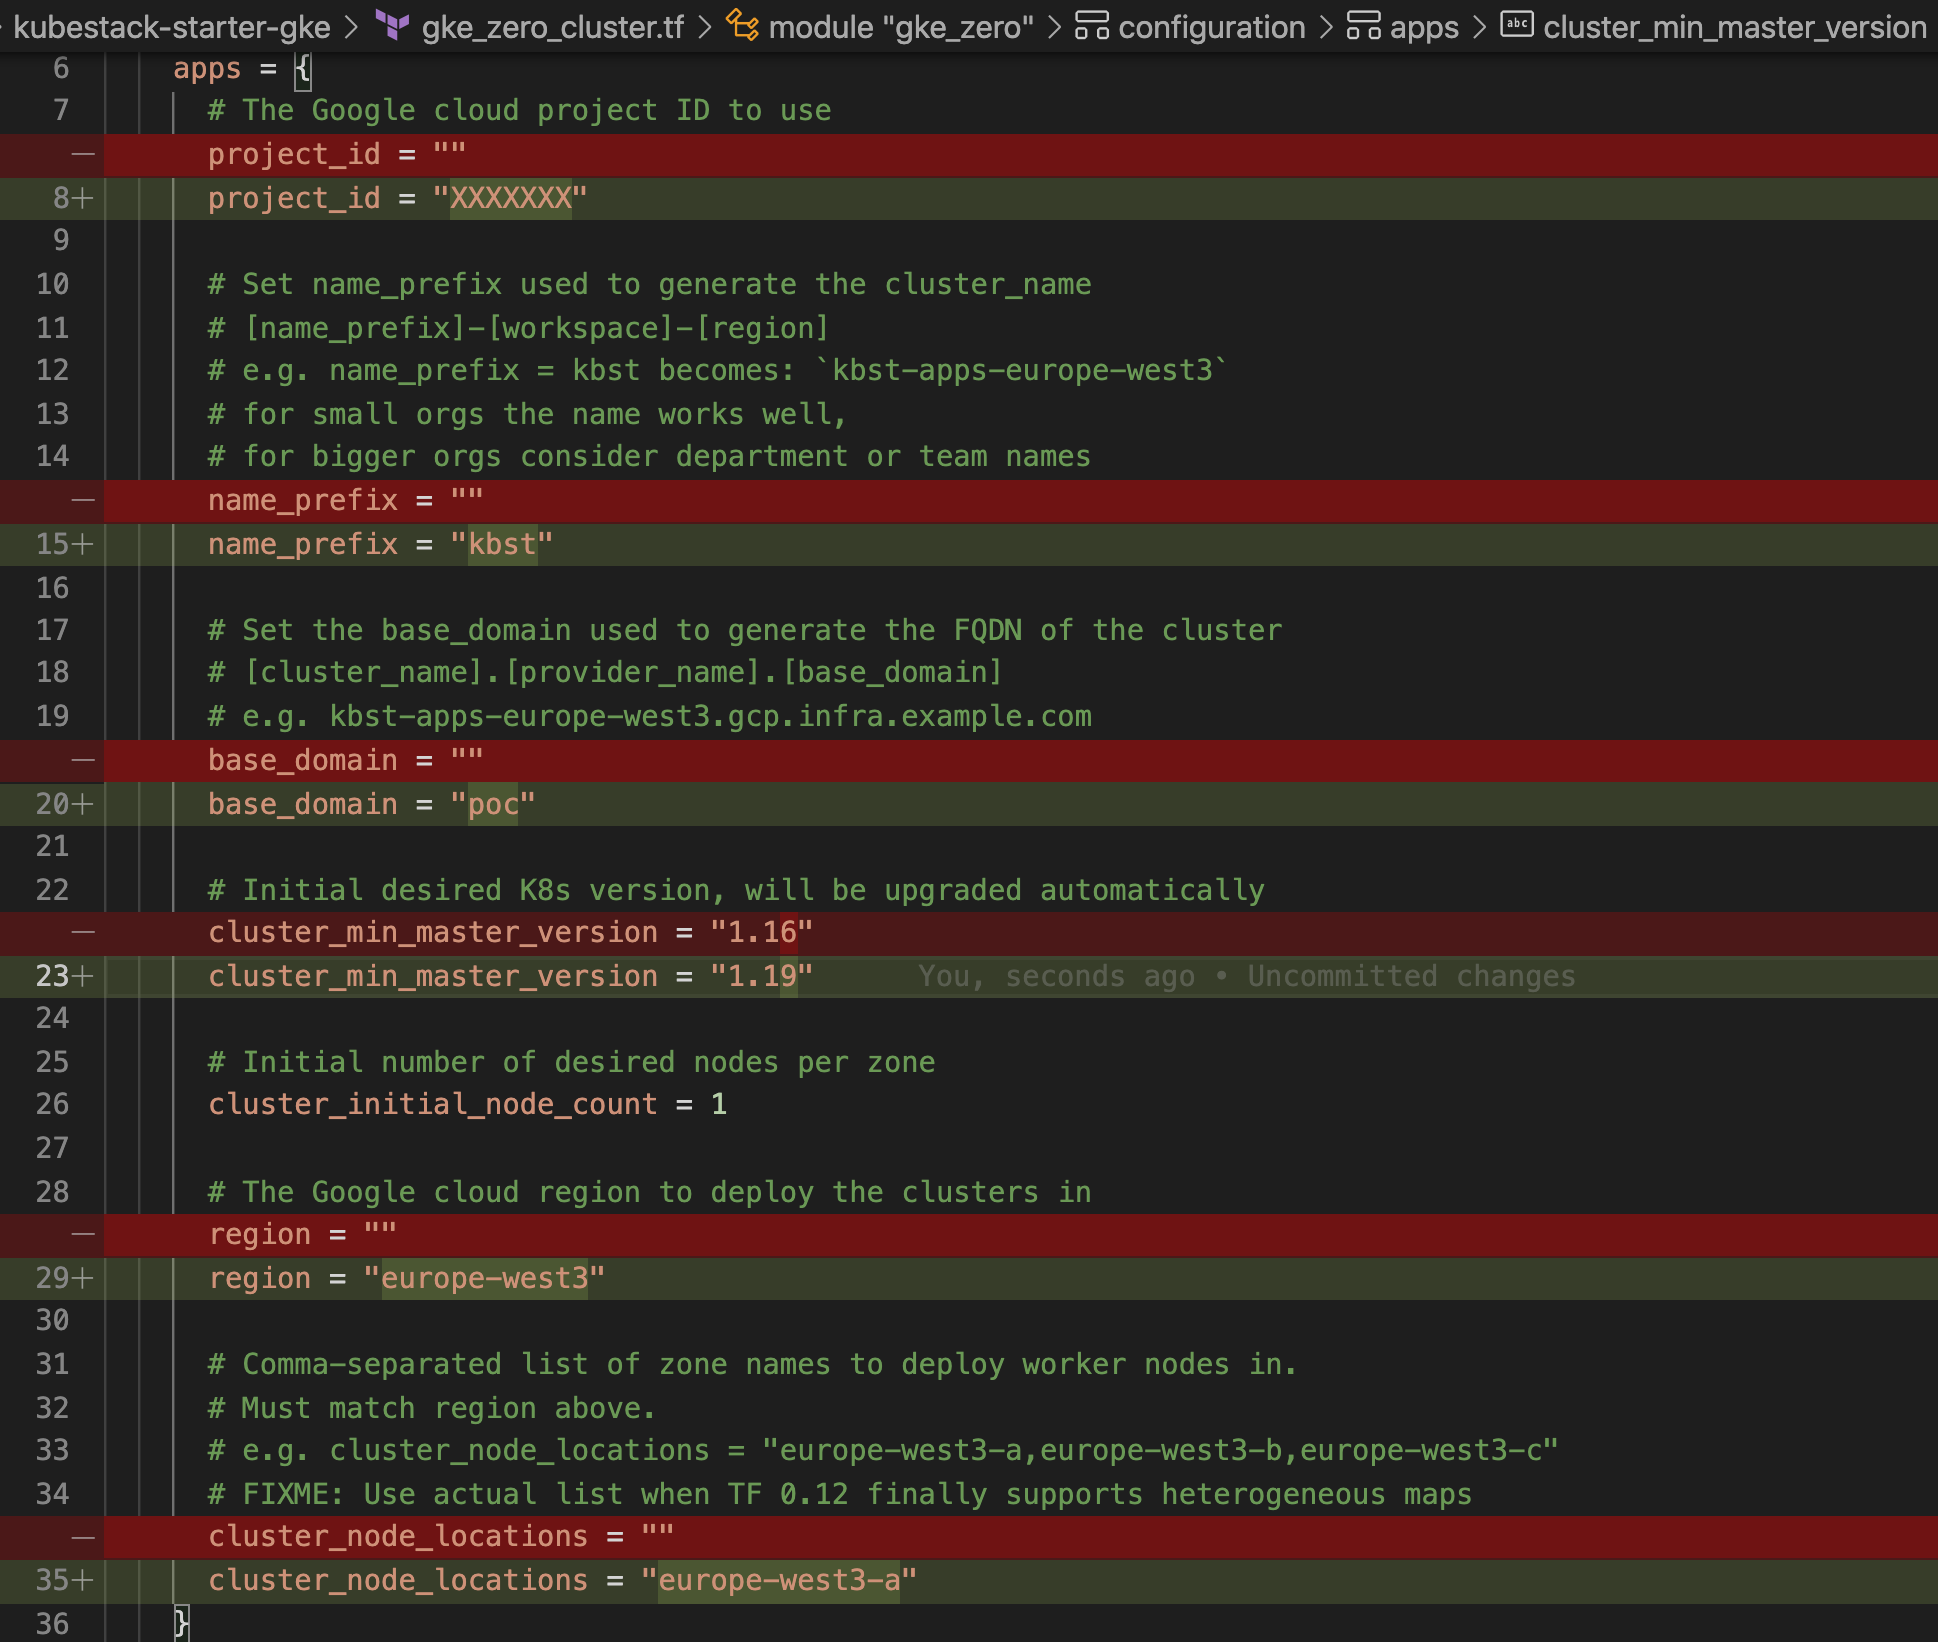
- By default , GKE tutorial git repo has k8s version as
1.16but GKE doesn’t support that as of now therefore i had to updatecluster_min_master_versionin kubestack-starter-gke/gke_zero_cluster.tf to1.19. - Also to get the tutorial to work below API’s also need to be enabled in GCP console:
- Identity and Access Management (IAM) API
- Cloud DNS API
- Kubernetes Engine API
- Cloud Resource Manager API
Initially i tried the macOS instructions but was blocked due to the “Internet Security” enabled on my macbook pro. Below is the error which i got:
1
2
3
4
 Error: Error accessing remote module registry
│
│ Failed to retrieve available versions for module "gke_zero_nginx" (gke_zero_ingress.tf:1) from kbst.xyz: Failed to request discovery document: Get
│ "https://kbst.xyz/.well-known/terraform.json": x509: certificate signed by unknown authority.
Instead of troubleshooting the macOS issue i spun up an Ubuntu, 20.04 LTS VM instance on GCP to continue the tutorial with Linux instructions.
Tutorial is categorized in 3 categories, mainly:
- Local Development
- Infrastructure provisioning
- Configuring Automation
Local Development
1
2
3
4
5
6
7
8
# Download the latest release
curl -LO "https://github.com/kbst/kbst/releases/download/$(curl -s https://www.kubestack.com/cli-latest.txt)/kbst_linux_amd64.zip"

# Extract the binary into your PATH e.g. /usr/local/bin
sudo unzip -d /usr/local/bin/ kbst_linux_amd64.zip kbst

# Verify the binary works
kbst --version
I tried the kbst version v0.1.5
1
2
3
4
5
# Use the kbst CLI to scaffold your repository using the GKE starter
kbst repo init gke

# Change into the starter directory
cd kubestack-starter-gke
This repository includes all the files required for tutorial to work
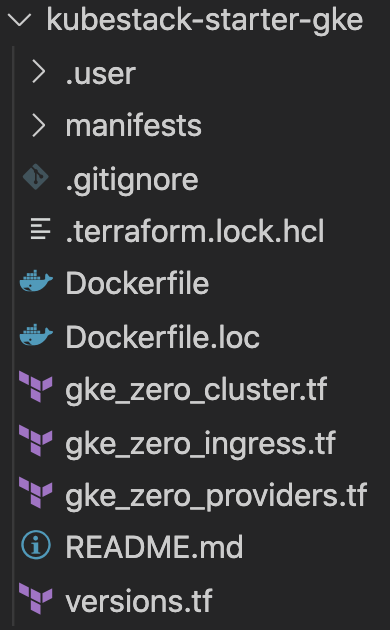
and just need to update few variables that gives you control on naming and region of GCP resources
Best part of kubestack is that you can try out the framework on your local and it helps you provision local cluster by using it’s CLI:
1
kbst local apply
If for some reason, you get some errors and you need to start from scratch or you are done with tutorial, just do the below:
1
kbst local destroy
Infrastructure provisioning
Another great thing while trying this tutorial is that the kubestack team have provided a docker image preinstalled with required tools to try out this tutorial.
Run below to create the container:
1
2
3
4
5
6
7
# Build the bootstrap container
docker build -t kbst-infra-automation:bootstrap .

# Exec into the bootstrap container
docker run --rm -ti \
    -v `pwd`:/infra \
    kbst-infra-automation:bootstrap
When the 2nd command finishes, terminal will be switched to the container terminal.
Next up, we would need to create a GCP IAM service account which will be used in GitHub Actions.
1
gcloud init
Here, just follow the instructions to configure with respective gcp project.
1
2
3
4
5
6
7
8
9
10
11
12
13
14
15
16
17
18
19
20
# Use the current project
PROJECT=$(gcloud config get-value project)

# Create the service account
gcloud iam service-accounts create kubestack-automation \
  --description "SA used for Kubestack Github Actions" \
  --display-name "kubestack-automation"

# Assign the owner role to the service account
gcloud projects add-iam-policy-binding ${PROJECT} \
  --member serviceAccount:kubestack-automation@${PROJECT}.iam.gserviceaccount.com \
  --role roles/owner

# Create service account keys
gcloud iam service-accounts keys create \
  ~/.config/gcloud/application_default_credentials.json \
  --iam-account kubestack-automation@${PROJECT}.iam.gserviceaccount.com

# Activate the service account and stop using your personal account
gcloud auth activate-service-account --key-file ~/.config/gcloud/application_default_credentials.json
As per terraform best practice, we need to save terraform state in a remote state backend . Here we will use GCP storage bucket .
1
2
3
4
# Set the location of your multi-regional bucket
# valid values are `asia`, `eu` or `us`
read -p "Bucket location: " LOCATION
1
2
3
4
5
6
7
8
9
10
11
# Create bucket and configure remote state
BUCKET_NAME=terraform-state-kubestack-`git rev-parse --short HEAD`
gsutil mb -l $LOCATION gs://$BUCKET_NAME
gsutil versioning set on gs://$BUCKET_NAME
cat > state.tf <<EOF
terraform {
  backend "gcs" {
    bucket = "${BUCKET_NAME}"
  }
}
EOF
Now that we have completed the bootstrap setup, we are good to run terraform commands which will provision required resources.
1
2
3
4
5
6
7
8
9
10
# Initialize Terraform
terraform init

# Create apps and ops workspaces
terraform workspace new apps
terraform workspace new ops

# Bootstrap the ops environment
terraform apply --auto-approve --target module.gke_zero
terraform apply --auto-approve
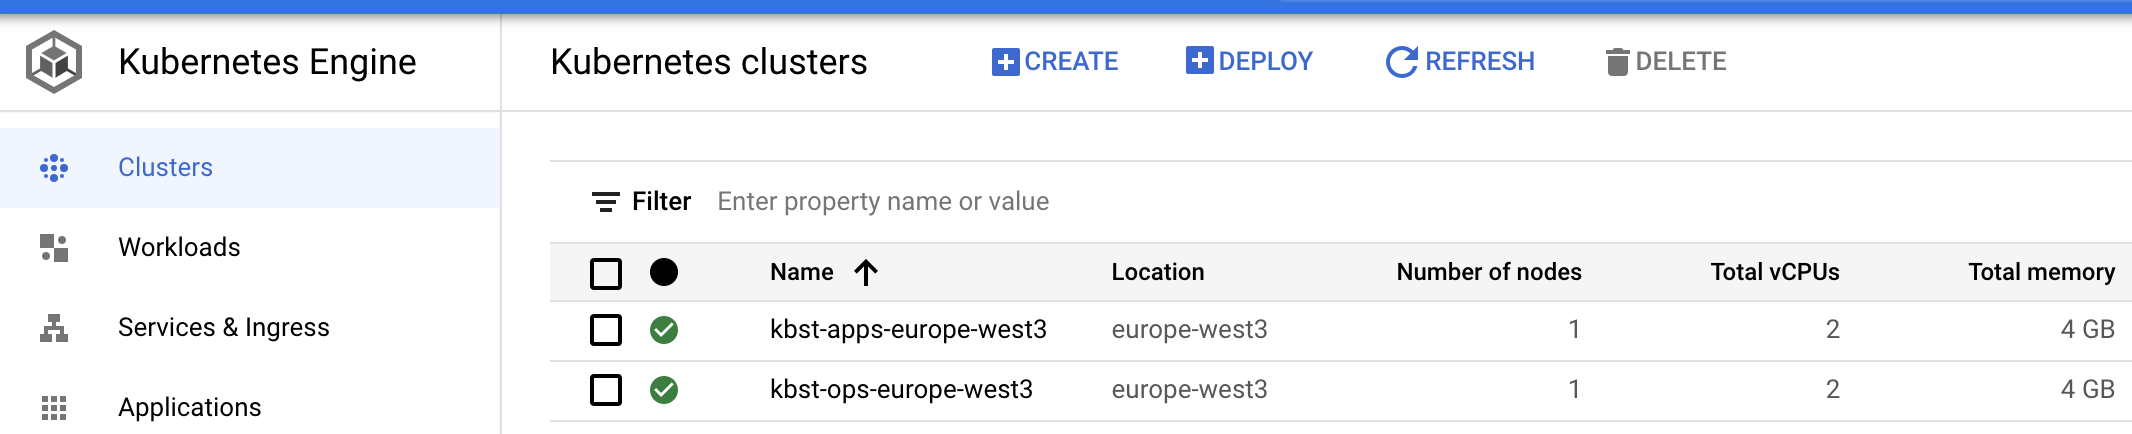
output will be something like:
1
Apply complete! Resources: 13 added, 0 changed, 0 destroyed.
1
2
3
4
# Bootstrap the apps environment
terraform workspace select apps
terraform apply --auto-approve --target module.gke_zero
terraform apply --auto-approve
output will be something like:
1
Apply complete! Resources: 18 added, 0 changed, 0 destroyed.
Terraform state file in bucket will have different state for each workspace:

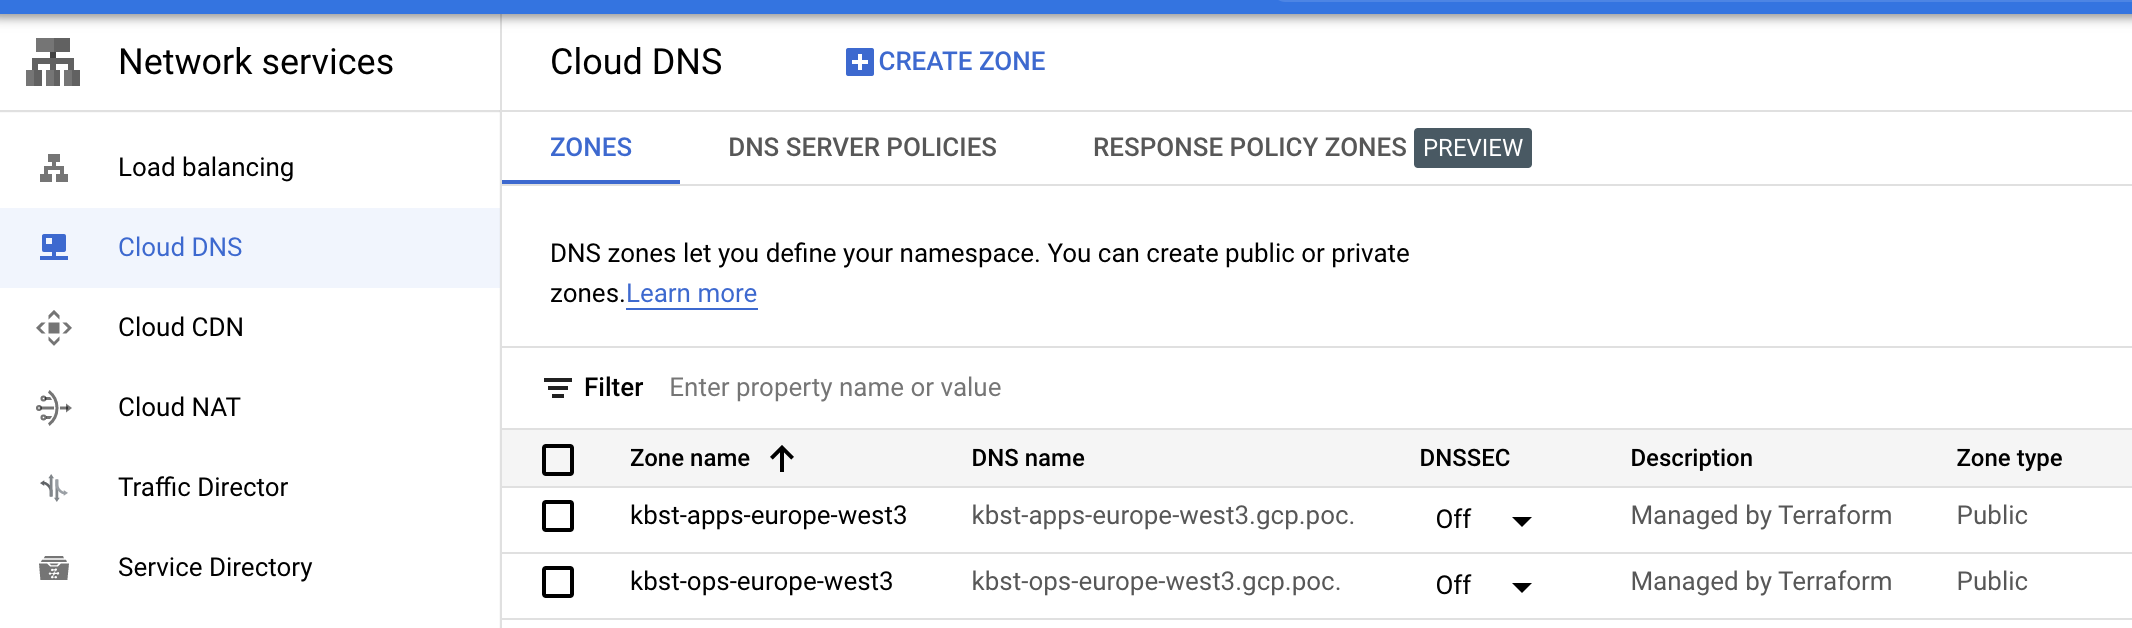
Now we need to setup DNS: For Ops:
1
2
terraform workspace select ops
terraform state show module.gke_zero.module.cluster.google_dns_managed_zone.current[0]
output will be something like:
1
2
3
4
5
6
7
8
9
10
11
12
13
14
15
16
17
# module.gke_zero.module.cluster.google_dns_managed_zone.current[0]:
resource "google_dns_managed_zone" "current" {
    description   = "Managed by Terraform"
    dns_name      = "kbst-ops-europe-west3.gcp.poc."
    force_destroy = false
    id            = "projects/XXXXXXXX/managedZones/kbst-ops-europe-west3"
    labels        = {}
    name          = "kbst-ops-europe-west3"
    name_servers  = [
        "ns-cloud-c1.googledomains.com.",
        "ns-cloud-c2.googledomains.com.",
        "ns-cloud-c3.googledomains.com.",
        "ns-cloud-c4.googledomains.com.",
    ]
    project       = "XXXXXXXX"
    visibility    = "public"
}
For Apps:
1
2
terraform workspace select apps
terraform state show module.gke_zero.module.cluster.google_dns_managed_zone.current[0]
output will be something like:
1
2
3
4
5
6
7
8
9
10
11
12
13
14
15
16
17
18
# module.gke_zero.module.cluster.google_dns_managed_zone.current[0]:
resource "google_dns_managed_zone" "current" {
    description   = "Managed by Terraform"
    dns_name      = "kbst-apps-europe-west3.gcp.poc."
    force_destroy = false
    id            = "projects/XXXXXXXX/managedZones/kbst-apps-europe-west3"
    labels        = {}
    name          = "kbst-apps-europe-west3"
    name_servers  = [
        "ns-cloud-c1.googledomains.com.",
        "ns-cloud-c2.googledomains.com.",
        "ns-cloud-c3.googledomains.com.",
        "ns-cloud-c4.googledomains.com.",
    ]
    project       = "XXXXXXXX"
    visibility    = "public"
}
Now we can exit the bootstrap container
1
exit
and commit changes to repo
1
2
git add .
git commit -m "Add cluster configuration"
Configuring Automation
We need a git repo for gitops to work. Therefore we will need to create a repo. We can create one on github.
- Next steps are very well documented at : Kubestack Automation
- Now we need to use the svc. account earlier created and configure it as secret:
In ubuntu, gcloud credentials are stored in a different path. Therefore, below doesn’t work:
1
cat .user/.config/gcloud/application_default_credentials.json | base64 -w 0 && echo
Instead below works:
1
cat ~/.config/gcloud/application_default_credentials.json | base64 -w 0 && echo
After this we need to add github actions pipeline file which will basically be trigerred for below 3 scenarios
triggered from a feature branch (Only Shows terraform plan for
opsworkspace).
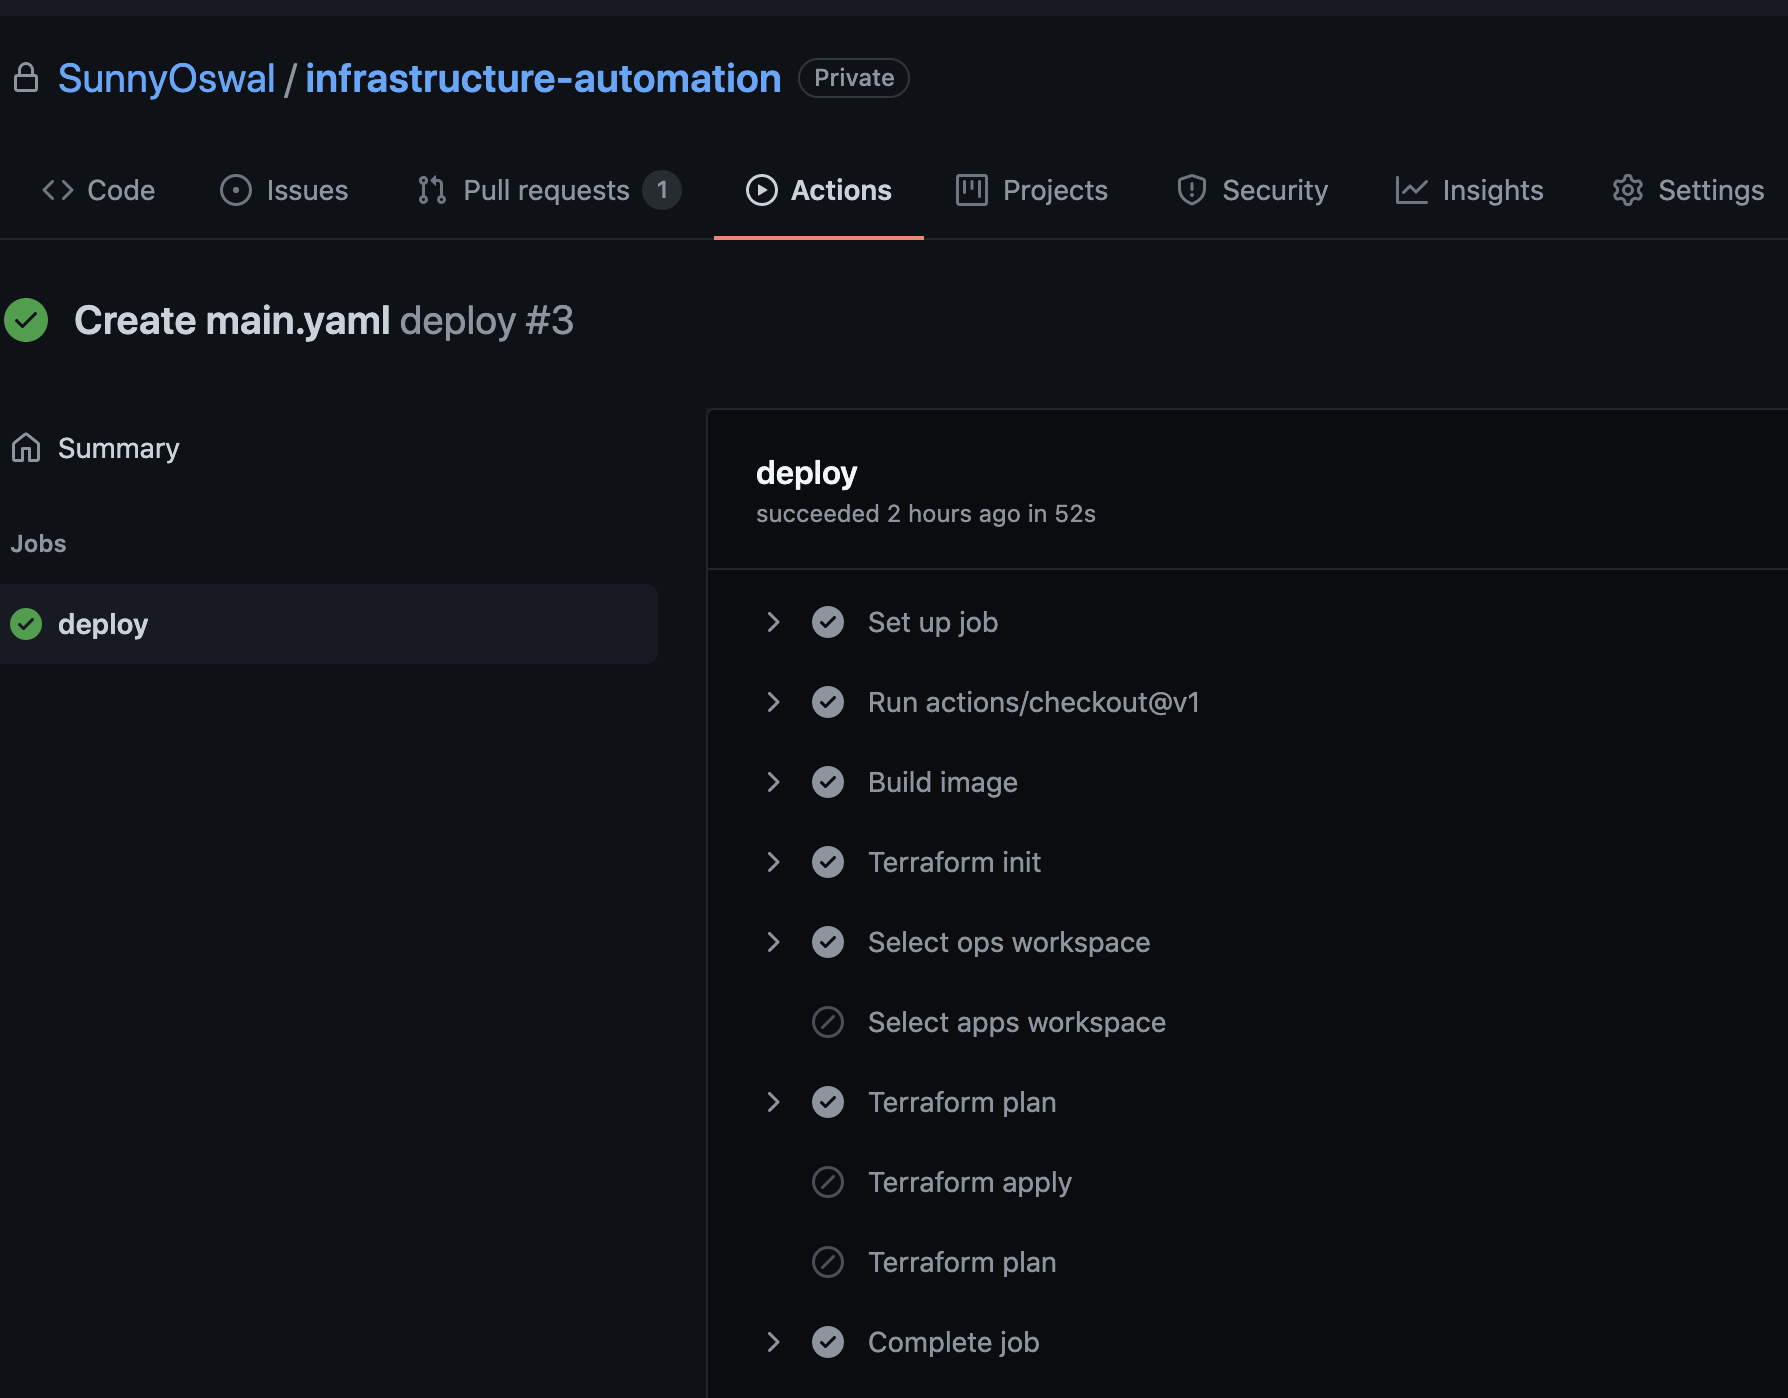
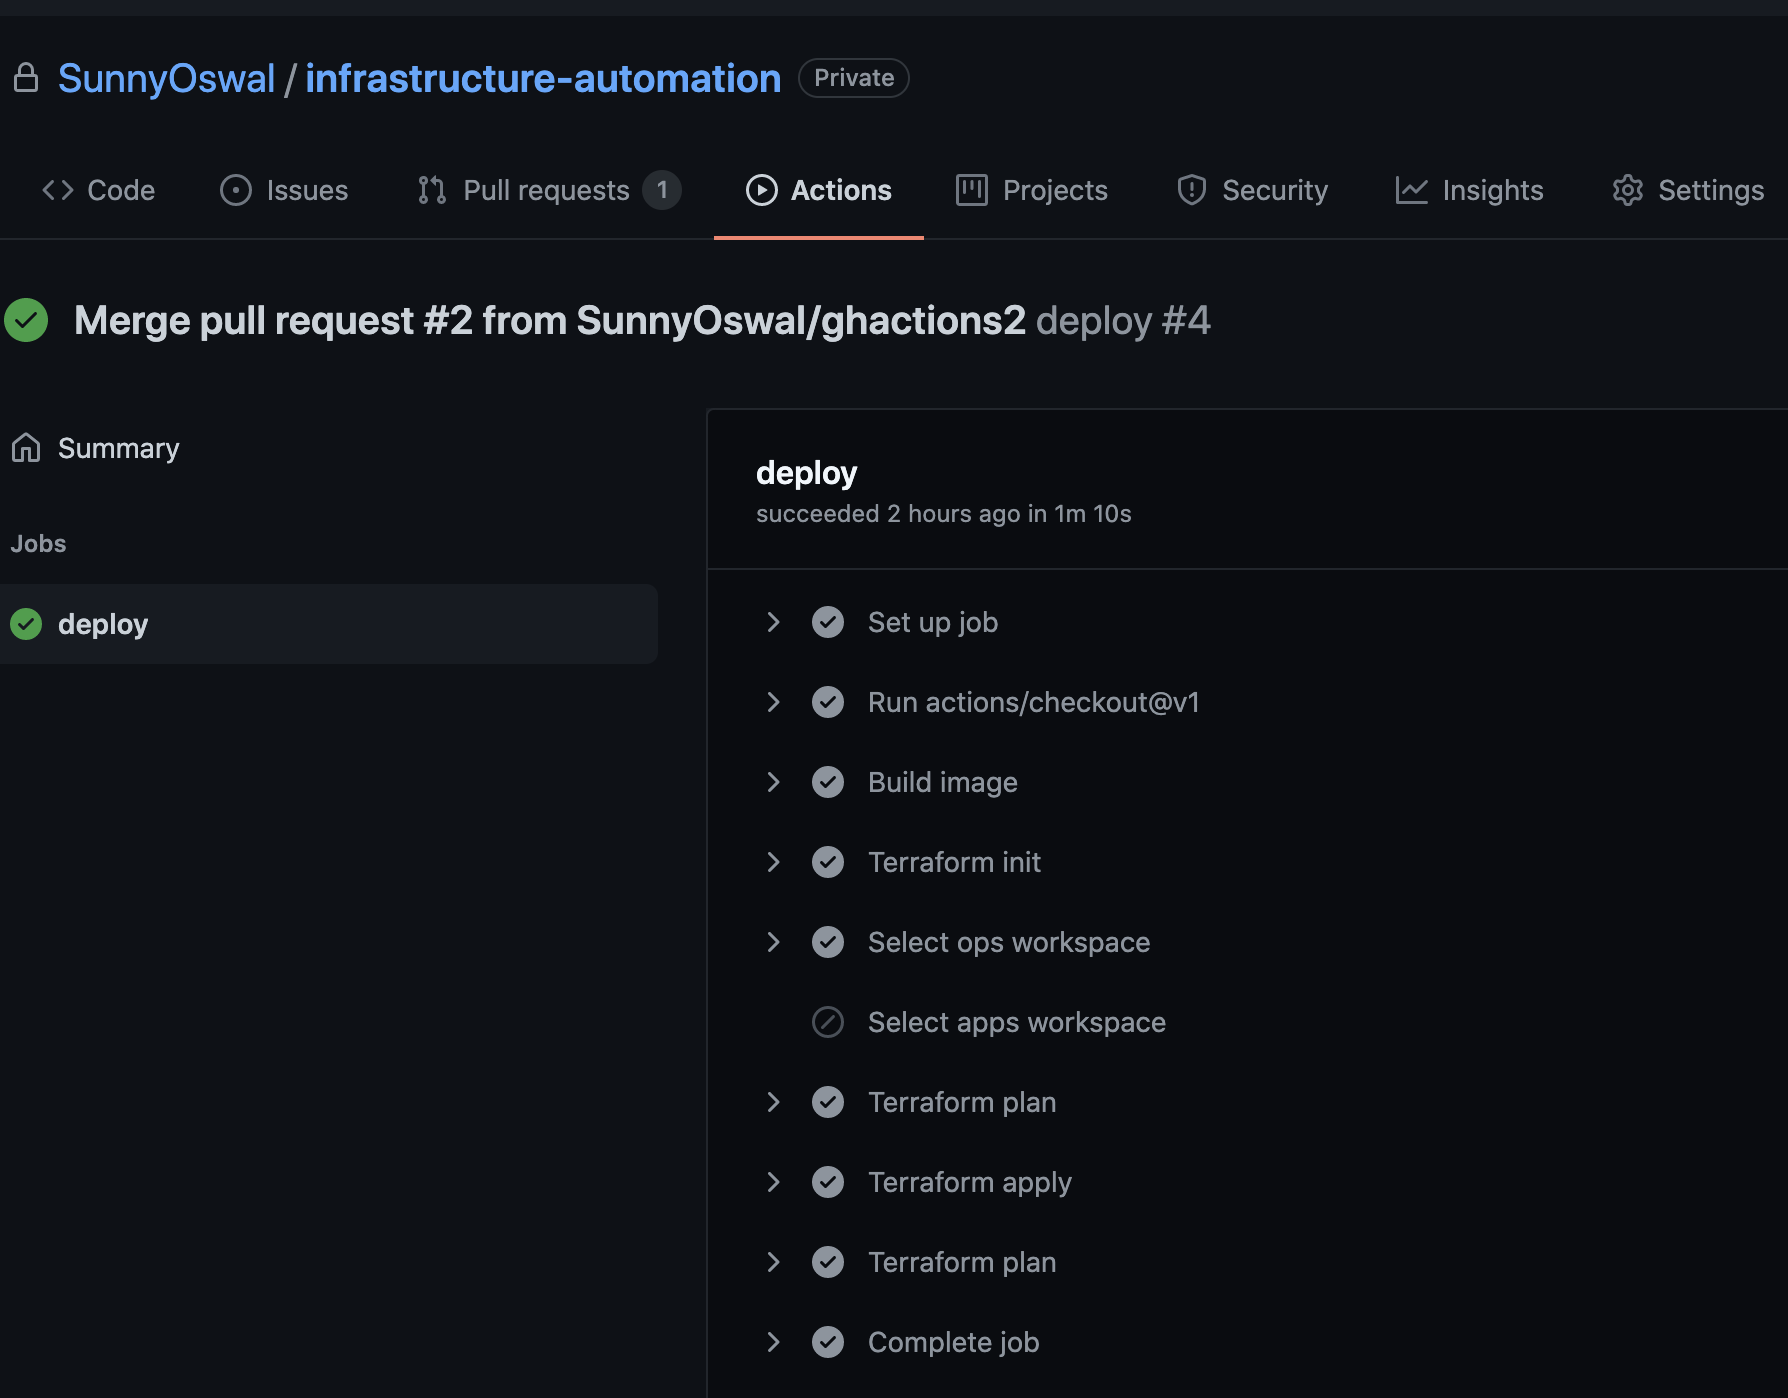
triggered from the main branch. (Applies changes for
opsworkspace).
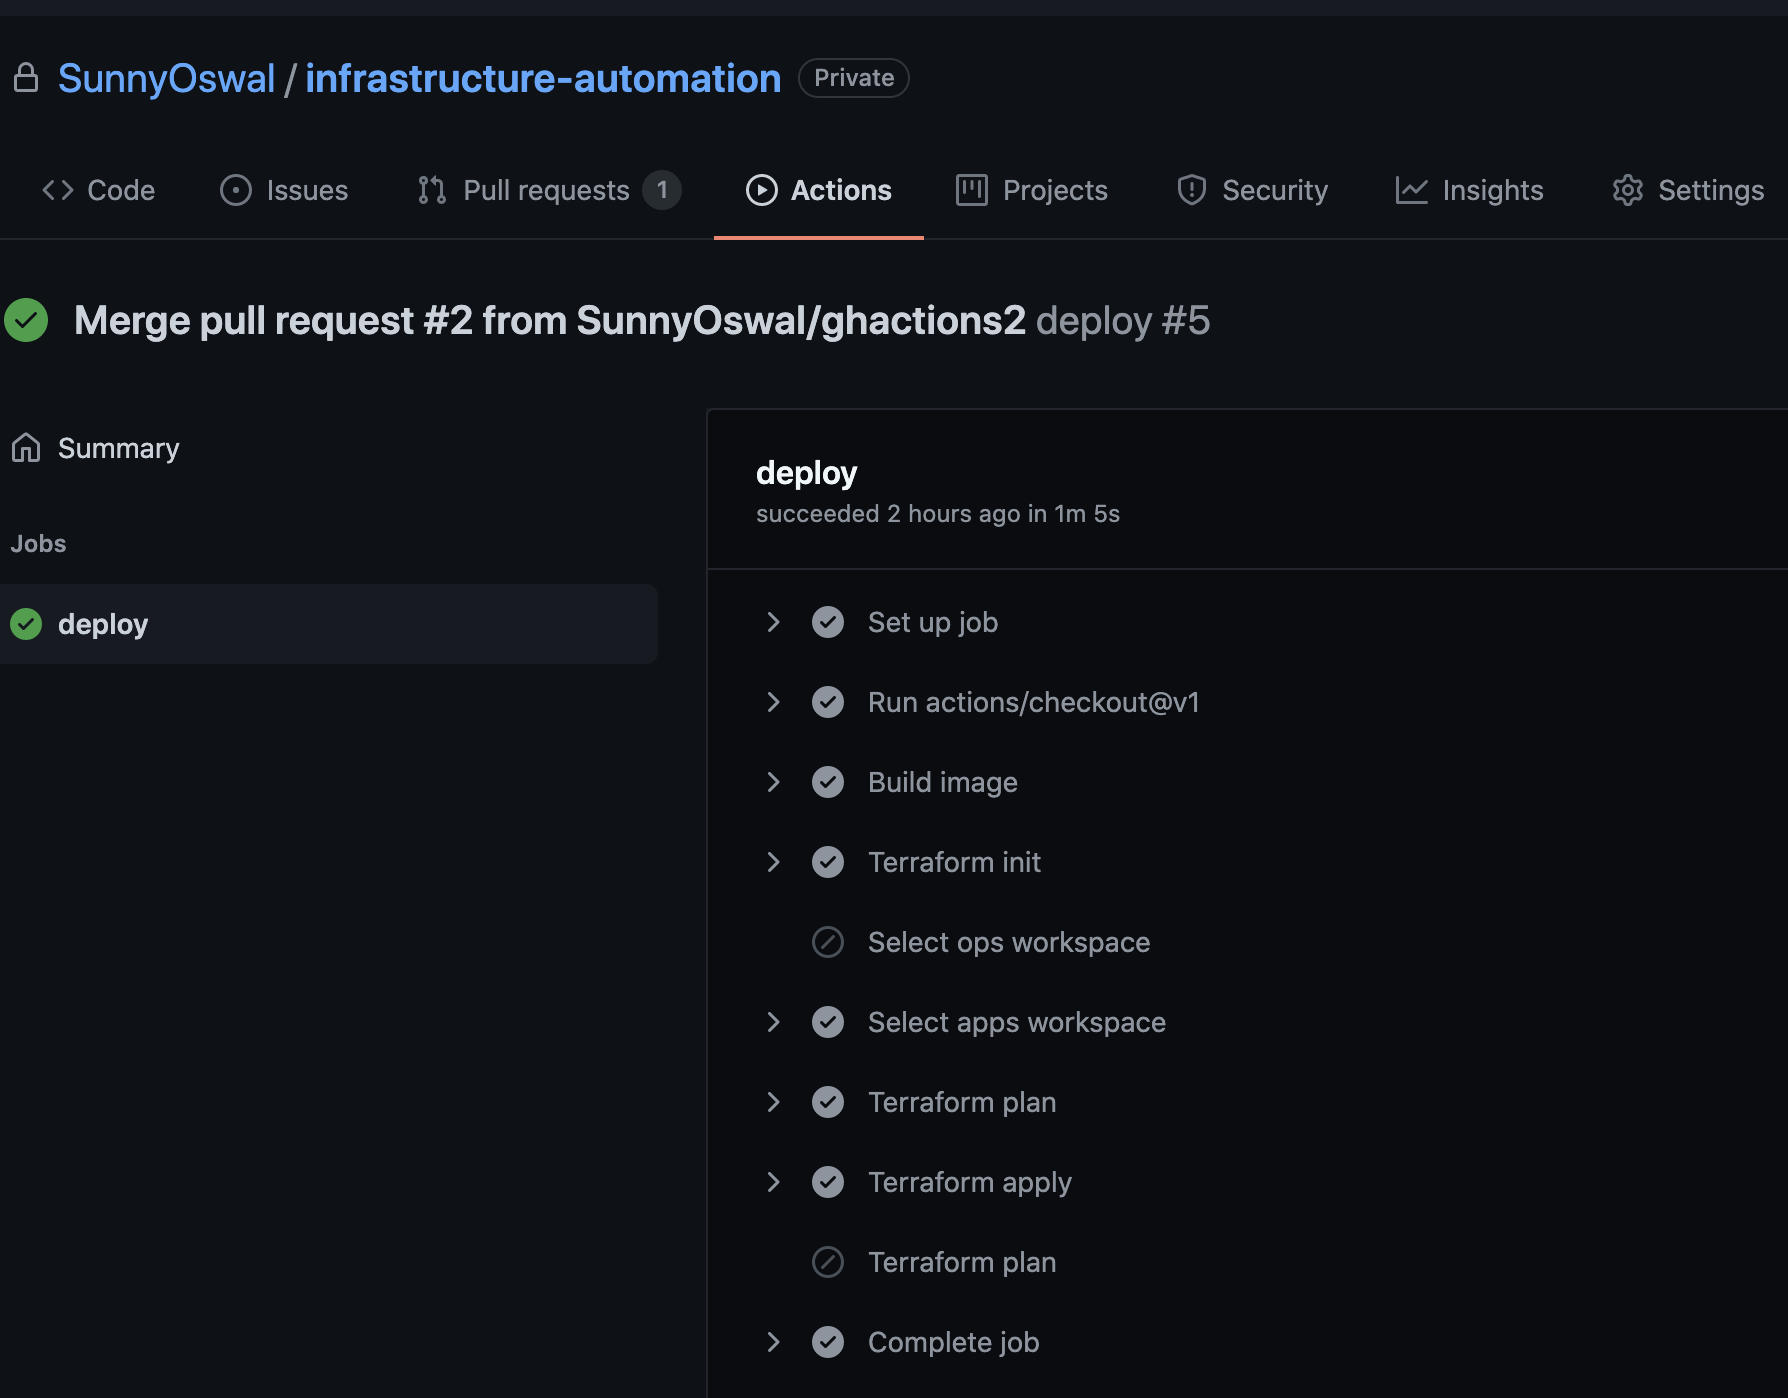
triggered from a tag the pipeline. (Applies changes for
appsworkspace).
Highlights of using kubestack:
- Top 3 Cloud providers supported - AWS , Azure & GCP.
- Easy to configure.
- It covers complete workflow from local to production. Not at all a half baked product. Definitely worth trying it out for a new project.
- It just works :heart_eyes: .
References:
Hope you like this post and Keep Learning !